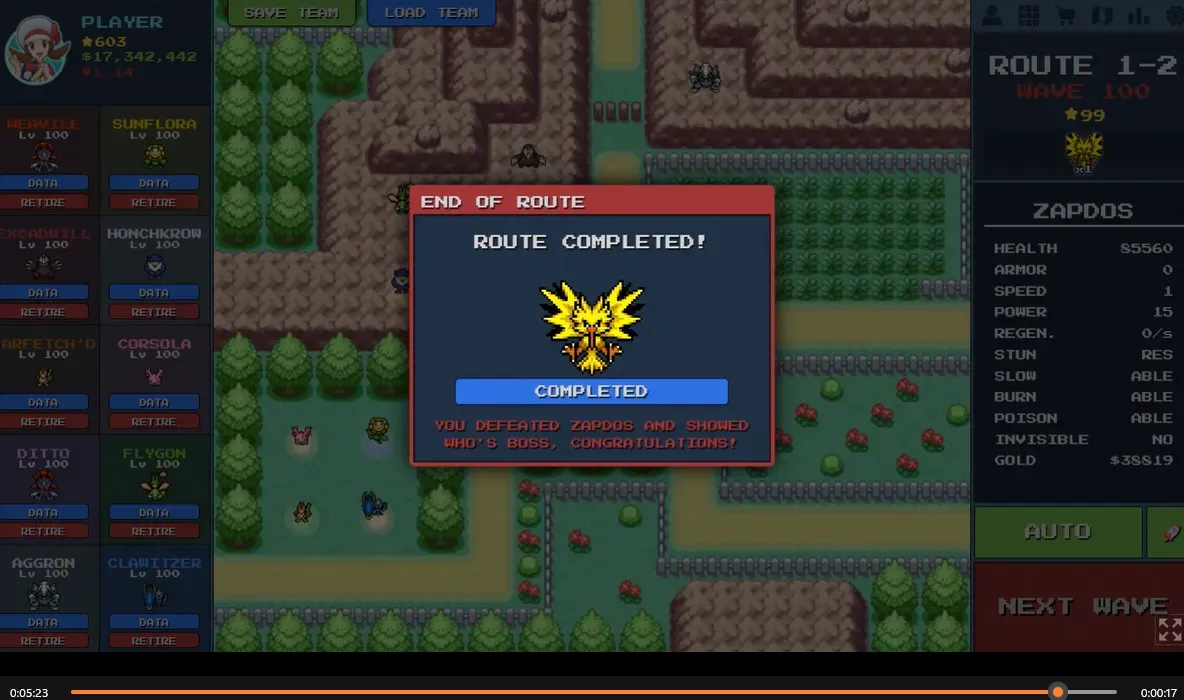
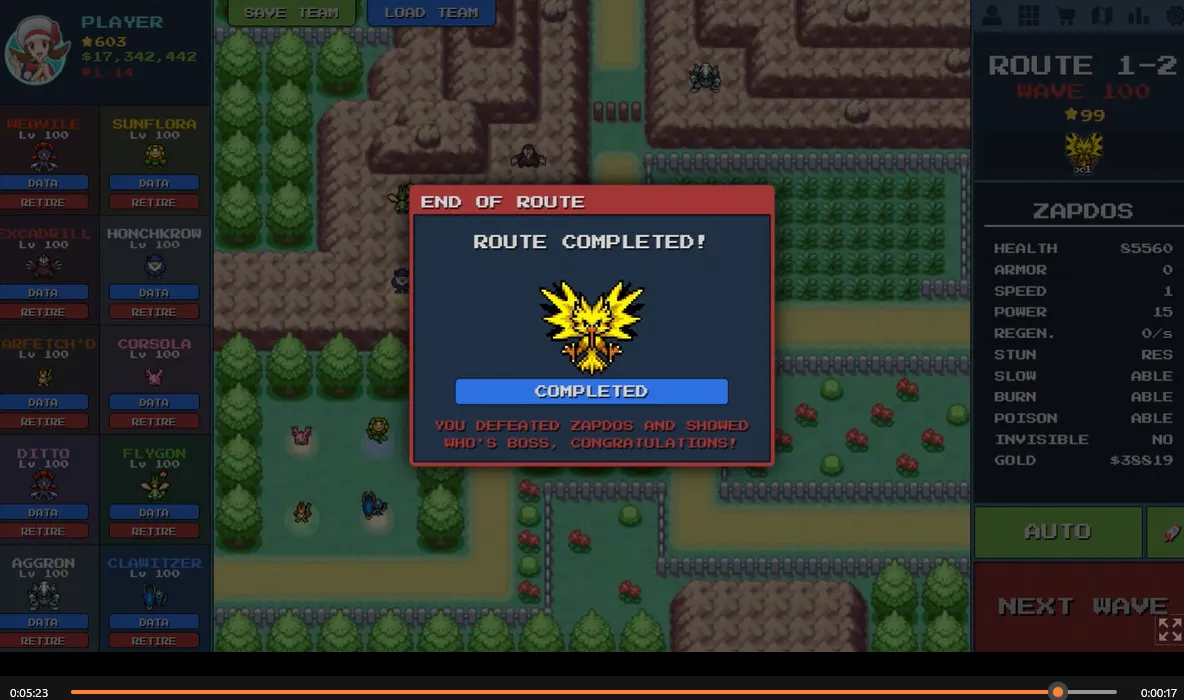
PokePath TD Route 1-2 Guide: Beating Zapdos (Wave 100 Strategy)
Route 1-2 is notorious for its split paths and lack of water, but the real challenge is Wave 100: Zapdos. This Legendary Bird is fast, tanky, and immune to many crowd control effects.
If your standard AOE team can clear Waves 1-99 but fails at the Boss, don't worry. You don't need to restart the whole run.
In this guide, we will break down the Perfect 10-Unit Team needed to obliterate Zapdos using a tactical "Clawitzer Swap."
🏆 The Team Explained: Why We Chose These Units
For Route 1-2, we need a mix of Spawn Camping Burst (to nuke Zapdos early) and Mid-Lane Security (to catch him if he splits). Here is the breakdown of our 10-unit squad:
1. The "Nuke" Squad (Bottom Left Spawn)
This group is your Boss Killer. Their job is to deal 80% of Zapdos' health the moment he spawns.
- Clawitzer (The MVP):
- Role: Burst Damage.
- Why? Swapped in at Wave 100. With 1,950 Power at Level 100 and a passive that deals Double Damage on Crits, it hits harder than any other unit. Since there is no water, Clawitzer is the only unit with enough raw stats to compensate.
- Farfetch'd:
- Role: Crit Buffer.
- Why? Increases Clawitzer's Critical Damage by 33%. This synergy turns Clawitzer's rockets into tactical nukes.
- Sunflora:
- Role: Damage Buffer.
- Why? Provides a flat +20% Damage Aura. Essential for maximizing the initial burst.
2. The Mid-Lane Defense (The Split Point)
If Zapdos survives the spawn nuke, he will run to the center and split either Up or Down. This squad covers both paths.
- Weavile:
- Role: DPS / Cleanup.
- Why? Fast attack speed and high crit rate. Weavile is placed centrally to reach enemies regardless of which path they take.
- Ditto (Copying Weavile):
- Role: Force Multiplier.
- Why? One Weavile is good; two are unstoppable. Copying Weavile ensures you have consistent DPS in the center.
- Corsola:
- Role: Crowd Control.
- Why? Even without water, a Level 100 Corsola has a 300 Range. Its Slow aura covers the entire junction, forcing Zapdos to crawl through your kill zone.
- Ampharos:
- Role: Hard CC (Stun).
- Why? Zapdos is fast. Ampharos provides a chance to Paralyze him, stopping him dead in his tracks for free hits.
3. The Utility Units
- Honchkrow (Mountain):
- Role: Anti-Invisible.
- Why? Essential for Waves 1-99 to spot invisible ghosts. Can be sold on Wave 100 for extra damage if needed.
- Aggron / Flygon (Mountain):
- Role: Chip Damage.
- Why? Takes advantage of the map's many mountain tiles to deal long-range AOE damage.
⚙️ The Winning Strategy: Step-by-Step
Phase 1: The Grind (Waves 1-99)
- Use Maractus in the grass patches and Aggron on the mountains to clear swarms.
- Keep Honchkrow active to catch invisible enemies.
Phase 2: The Tactical Swap (Wave 100)
- Pause the game as soon as Wave 100 starts.
- Retire Maractus. It is weak against single targets.
- Deploy Clawitzer in the Bottom Left corner (closest to spawn).
- Surround Clawitzer with Farfetch'd and Sunflora.
- Set Targeting: Make sure Clawitzer is set to "Strong" or "First".
Phase 3: The Infinite Retry
- Unpause. Zapdos should lose half his HP instantly from Clawitzer.
- The Finish: Weavile and Ditto finish him off in the middle.
- If you fail: Don't panic! The game's Infinite Retry mechanic lets you restart Wave 100 instantly. Adjust your positioning and try again.