•
2026-01-02T03:13:12.679Z
•17 minutes

PokePath TD Route 1-3 Guide: Best Team to Defeat Moltres
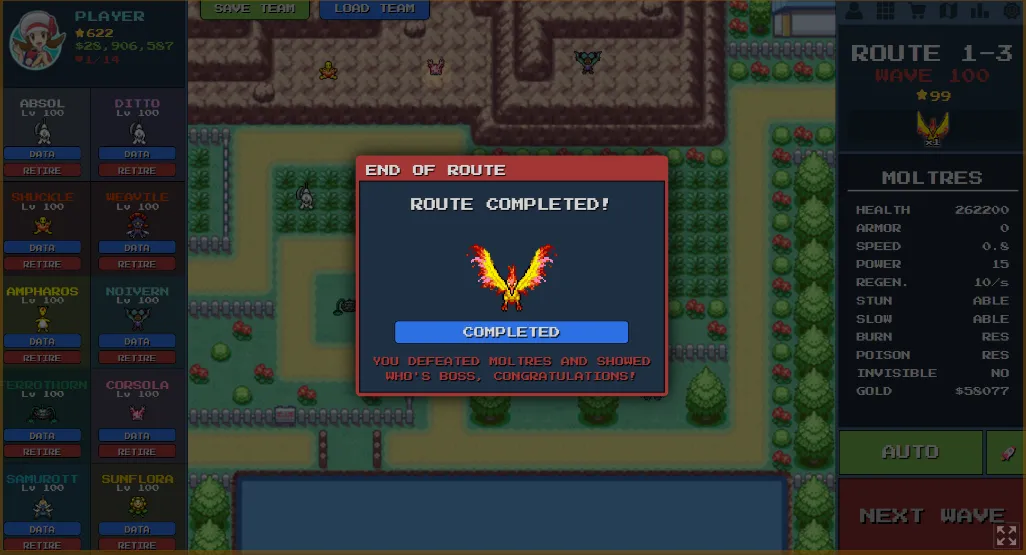
Route 1-3 is the final stage of the first region, featuring a mix of water, grass, and mountain terrain. The ultimate challenge is Wave 100: Moltres, the Legendary Fire Bird.
While Water-types seem like the obvious choice, the true secret to beating this map lies in a specialized Hybrid Control Team.
In this guide, we reveal the Level 100 "Double Absol Lock-On" Strategy that crushes Moltres using damage scaling and global crowd control.
🗺️ Map Strategy: Controlling the Flow
Route 1-3 has three distinct zones you must utilize:
- Mountain (Top Left): Perfect for long-range snipers and anti-invisible units.
- Choke Point (Middle): Where paths converge, ideal for slowing enemies.
- Kill Zone (Bottom Right): The final stretch where your heavy hitters finish off the Boss.
🏆 The Best Team Composition (10-Unit Setup)
We have crafted the perfect team to counter Moltres' high speed and health.
1. The High-Ground Snipers (Top Left Mountain)
- Absol (Level 100):
- Role: Damage Scaling.
- Passive: Deals more damage with each consecutive hit on the same target.
- Why? Placed on the mountain, Absol locks onto Moltres early, stacking infinite damage.
- Ditto (Copying Absol):
- Role: The Multiplier.
- Why? By copying Absol, you have TWO units stacking damage on Moltres simultaneously. This melts the Boss HP bar before it even reaches the middle.
- Noivern / Honchkrow:
- Role: Anti-Invisible / AOE.
- Why? Essential for clearing invisible mobs in earlier waves and providing long-range AOE support.
2. The Mid-Lane Control (Global Slow)
- Corsola:
- Role: Global Slow.
- Passive: At Level 100, its 300-Range Ring Attack slows almost the entire map.
- Why? Moltres is fast. Corsola forces it to crawl.
- Ferrothorn:
- Role: Secondary Slow.
- Passive: Attacks apply a slow effect.
- Why? Stacks with Corsola to ensure enemies are permanently hindered.
- Ampharos:
- Role: Hard Stun.
- Passive: 30% chance to Paralyze.
- Why? A clutch stun can stop Moltres right in the kill zone.
3. The "Kill Zone" (Bottom Right)
- Weavile:
- Role: The Finisher.
- Passive: 65% Crit Rate + Double Crit Damage.
- Why? Any Boss that survives the Absol barrage gets one-shot by Weavile's crits.
- Sunflora:
- Role: Damage Buffer.
- Passive: +20% Damage Aura.
- Why? Boosts Weavile and nearby units for maximum burst.
⚔️ The Core Secret: Why This Team Wins
The secret to beating Route 1-3 isn't just spamming Water types. It's the "Three-Layer Defense":
- Layer 1 (The Lock-On): The Double Absol setup starts damaging Moltres the second it spawns. Because Absol's damage scales with every hit, by the time Moltres reaches the middle, it is taking massive damage per second.
- Layer 2 (The Quick-Sand): Corsola and Ferrothorn turn the map into quicksand. Moltres spends twice as long walking through the Absol's range because it is permanently slowed.
- Layer 3 (The Execution): If Moltres somehow survives with 10% HP, it walks into the range of a Buffed Weavile, which delivers the final critical blow.
📝 Step-by-Step Execution Guide
- Deployment:
- Place Absol and Ditto on the Top Left Mountain.
- Place Corsola and Ferrothorn near the middle junction.
- Place Weavile and Sunflora in the Bottom Right grass patch.
- Targeting:
- Set Absol and Ditto to "Strong" to ensure they lock onto Moltres immediately.
- The Boss Wave (100):
- Watch as Moltres gets slowed to a crawl.
- The combined scaling damage from two Absols will likely kill it before it even reaches Weavile.
- If it survives, Weavile will clean up.
🎥 Watch the Strategy in Action
Share this article